Table of Contents
WHAT YOU NEED
- Tablet or Cellphone for office attendance – where you will install the QRpho app, see specs below
- Cellphone – for the employees for QR Code ID and accessing their attendance data
- List of Employees – to be encoded in the system for testing or you can use the sample employees in the QRpho website
- Internet Connection – Wifi or mobile data for syncing data to QRpho website
- Photo paper or Bond paper – for printing QR ID, if not, employees can install QRpho app in their cellphone and the QR Code ID there
- Laptop/Desktop Computer – to monitor the attendance data in your QRpho Website
- QRpho Website Login Details – sent to you via email or accessible in your dashboard in Qrpho.com
- App Authorization ID – fetch it in your QRpho website under App Authorization menu
- Supervisor Pass – get it in your QRpho website under App Authorization menu
- QRpho app – download at www.qrpho.com homepage
OVERVIEW of the SETUP PROCESS
1. Prepare the items needed.
- Tablet/Cellpone – for office attendance
- Cellphone for staff use
- Bondpaper/Photo paper for printing the QR Code ID
- Wifi/Mobile data internet connection
- QRpho Website login details – get the username and password from your Customer Dashboard at qrpho.com or in your email
- Login details for installing the app – login to your QRpho website to get the info
- App Authorization – see App Authorization menu and fetch the info
- Supervisor Passcode – see App Authorization menu
- Username and Password of the employees for Staff Access testing – see User’s menu
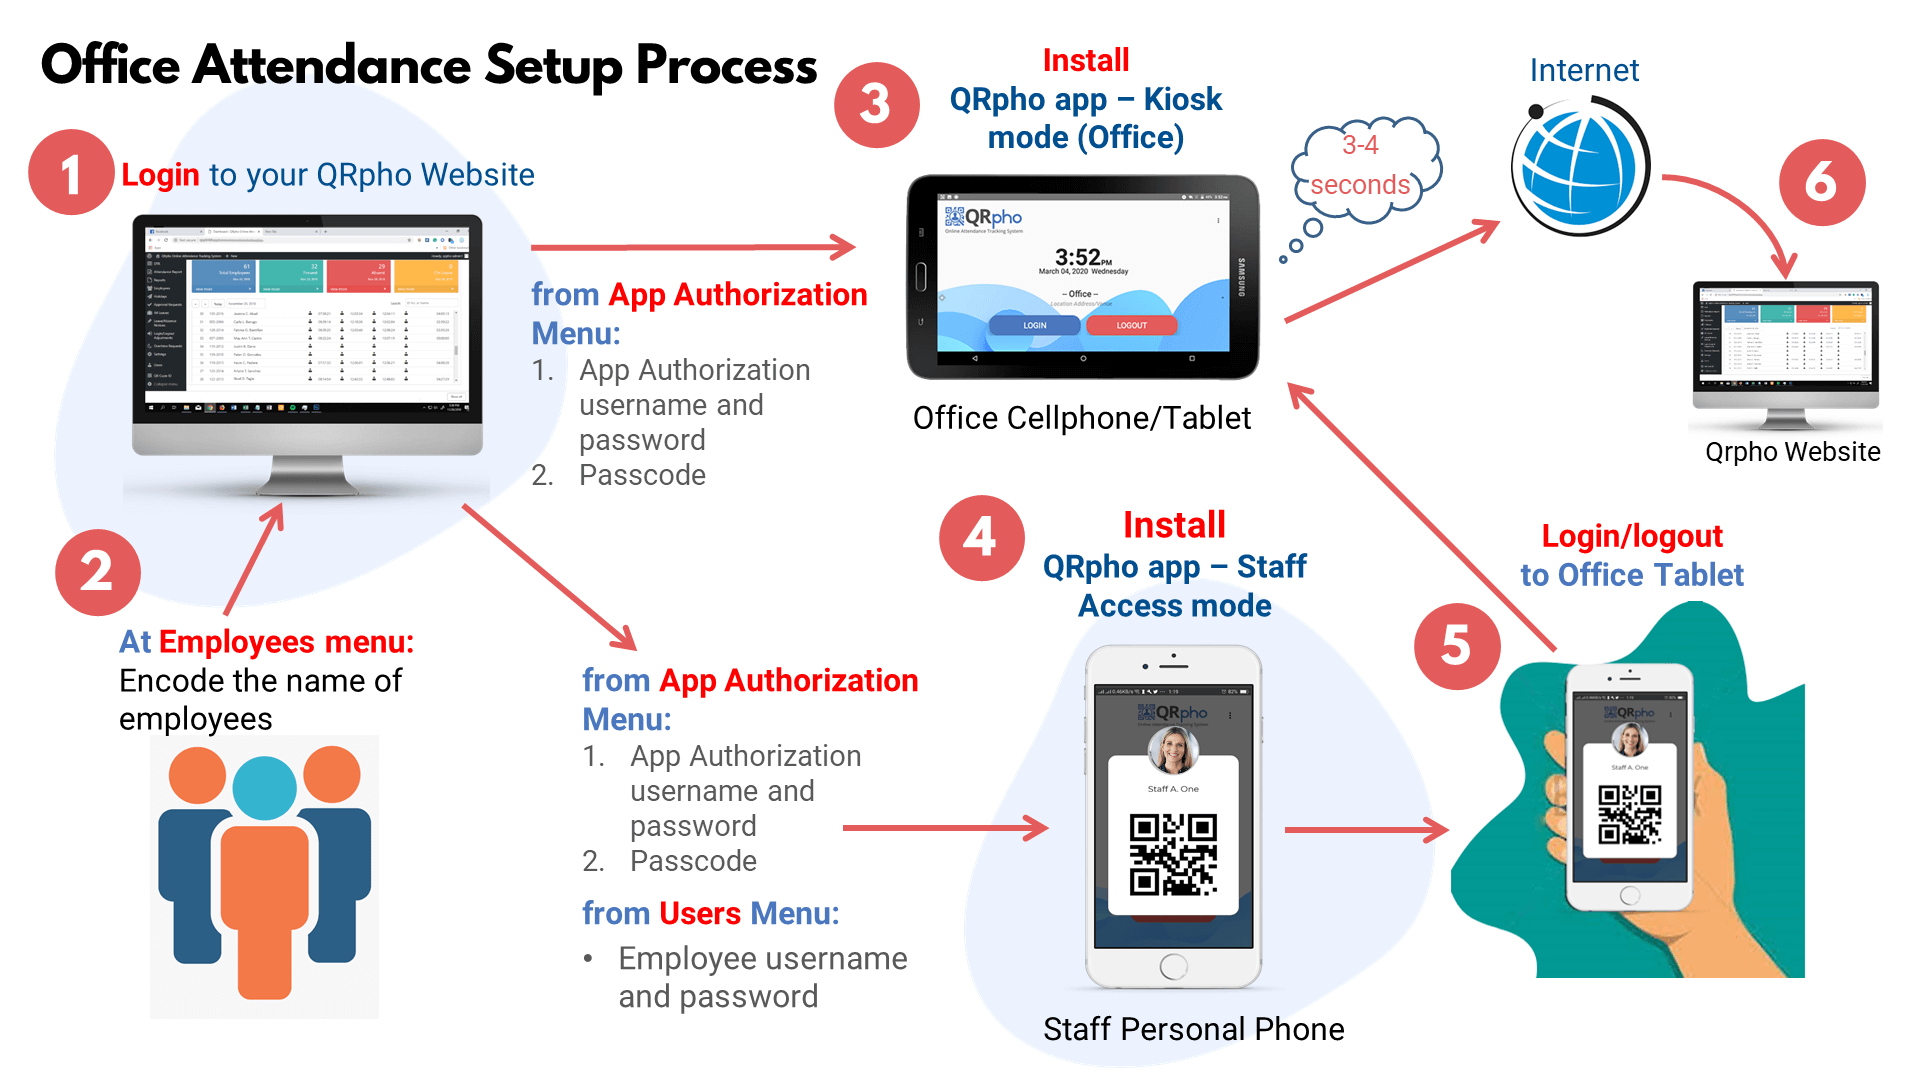
2. Login to your QRpho website and go to the App Authorization menu and fetch the App Authorization ID and Supervisor Passcode.
3. Encode your list of employees or use the existing sample employees in the system for trial use.
4. Get the tablet/cellphone for office use and install the Qrpho Office app (downloaded from qrpho.com) then set to Kiosk mode.
5. Get the staff cellphone and install the QRpho app and set to Staff Access. Get the Staff’s username and password in the User’s menu of your QRpho website. If none, create a new User profile.
6. Go to QR Code menu of your QRpho website and print the QR Code ID of the employee for testing using bond paper or photopaper.
7. Wait for at least 15 minutes to sync the employee data in the website to the tablet/cellphone. If you cannot wait, go to the tablet and tap the three (3) dots on the top right and tap “Download Employee Data and ”Download App Settings Data”.
8. Test logging in and logging out in the tablet by tapping on the Login/Logout buttons on the tablet, placing the QR ID in front of the camera, tap “Take Photo” to post the attendance data in the app. For the QR Code ID, you may use the one printed on bond paper or photopaper or the QR Code in the Staff Access QRpho app.
Make sure the tablet/cellphone is connected to the Internet. If the tablet says “Cannot login [Name of Employee]. Not yet registered!”, then you have to tap “Download Employee Data” so that the data will be downloaded to the tablet and the employee can start logging in/out in the tablet.
If Internet is down, there is no need to worry. The attendance data is just stored in the tablet and it syncs automatically to your QRpho website once internet connection is detected.
9. If you have questions or in need of help or assistance in setting up the trial, please chat us at our QRpho Facebook account or send us an email at [email protected] or [email protected].