Setting up the QRpho website
1. Login as Administrator to your designated QRpho website using the login details sent to you via email.
QRpho website address: https://yourwebsite.qrpho.com
Username: yourusername
Password: yourpassword
- Your clean dashboard shows up.
ADDING NEW EMPLOYEES
- Go to the “Employee” menu and start encoding the names and employee details. Make sure the Name of the Employee and ID number are correctly encoded in the web as this will be basis for the creation of the QRpho ID. Employee name and ID number must be encoded first to sync it with the app in the tablet. Other employee info may be updated later.
The employee information are added in the website and not in the app. Therefore, any updates in the employee information must be done in the website then sync later to the tablet.
CONFIGURING THE SETTINGS
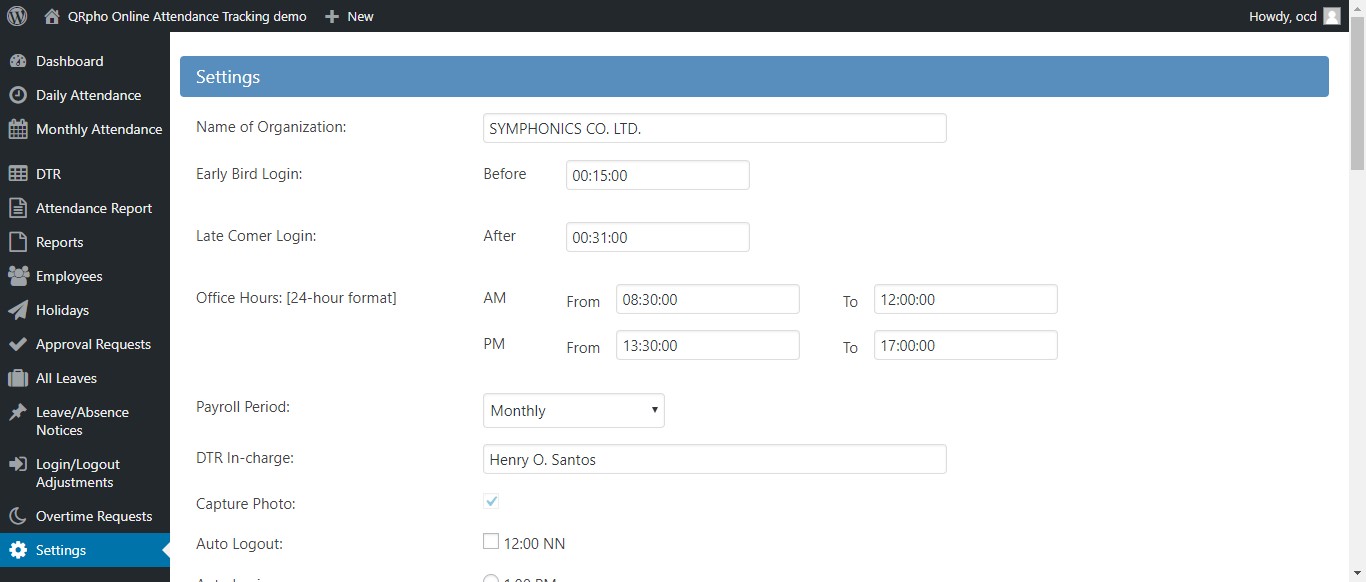
- Go to the “Settings” menu and configure it according to your preference.
| Name of Organization: | Enter the name of your organization |
| Early Bird Login: Before | Enter the number of minutes BEFORE the office hours when the employee will considered an early bird/comer. Most companies consider an Early Bird if he/she comes at least 15 minutes before the official office hours. |
| Late Comer Login: After | Enter the number of minutes AFTER the office hours when the employee will considered an Late comer. Most companies consider an employee as Late Comer if he/she comes at least 15 minutes after the official office hours. |
| Office Hours: [24 hour format] | Indicate here in 24-Hour format the office hours of the organization such as: AM FROM: 08:00:00 TO: 12:00:00 PM FROM: 13:00:00 TO 17:00:00 |
| Payroll Period: | Choose from: 15th and End of Month, 5th and 20th, Monthly. Most government offices are on Monthly payroll period. |
| DTR In-charge: | Indicate here the person in-charge to sign the DTR. |
| Capture Photo: | Check the box if you want the app to capture the photo of the employees (Recommended). However, you can opt not to capture photo for your attendance if you find photo capture not useful or practical for your purpose. |
| Auto Logout: | Click this option if you want an auto-logout for all employees during lunch time. Not advisable. |
| Auto Login: | Click this option if you want an auto-login for all employees after lunch time. Not advisable. Just choose which is your preferred time for auto-login. Not advisable. |
| HOLIDAY SETTINGS: | |
| Rest Days | Indicate here the company’s official rest days for all employees. This is important in the computation of holiday credit on rest days. |
| Regular Holiday: | |
| Rate | % holiday credit on work done on office hours during a regular holiday |
| Overtime | % holiday credit on work done on after office hours during a regular holiday |
| Rest Day | % holiday credit on work done on during rest days during a regular holiday |
| Special Holiday: | |
| Rate | % holiday credit on work done on office hours during a special holiday |
| Overtime | % holiday credit on work done on after office hours during a special holiday |
| Rest Day | % holiday credit on work done on during rest days during a special holiday |
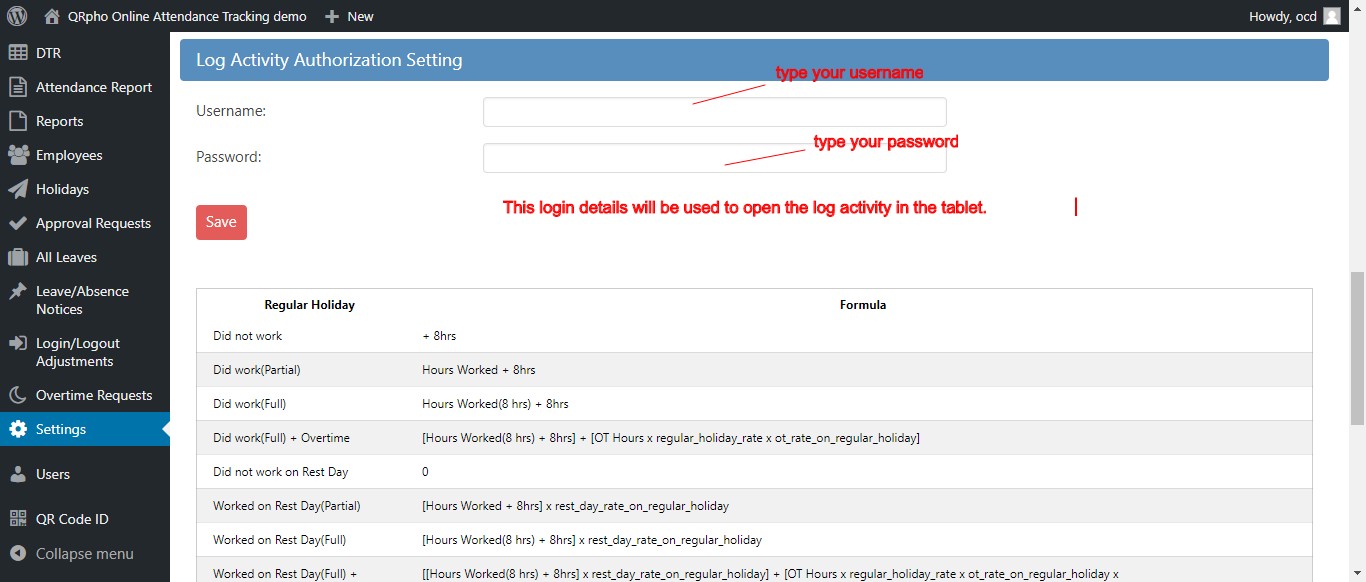
| Log Activity Authorization Setting | |
| Username and Password | This is username and password will be used to access the log activity in the tablet. |
See screenshot of sample Settings setup
- Once you are done configuring the settings, Save it.
- Then go to the app, and follow these steps:
First App Run
- Run the App by pressing the QRpho icon.
- Main Window must not contain any data as of this moment.
- Press the three dots on top-right corner of the app.
- Select Download Employee Data (Employees must first be added on your Website)
- After Download has completed, select Download App Settings.
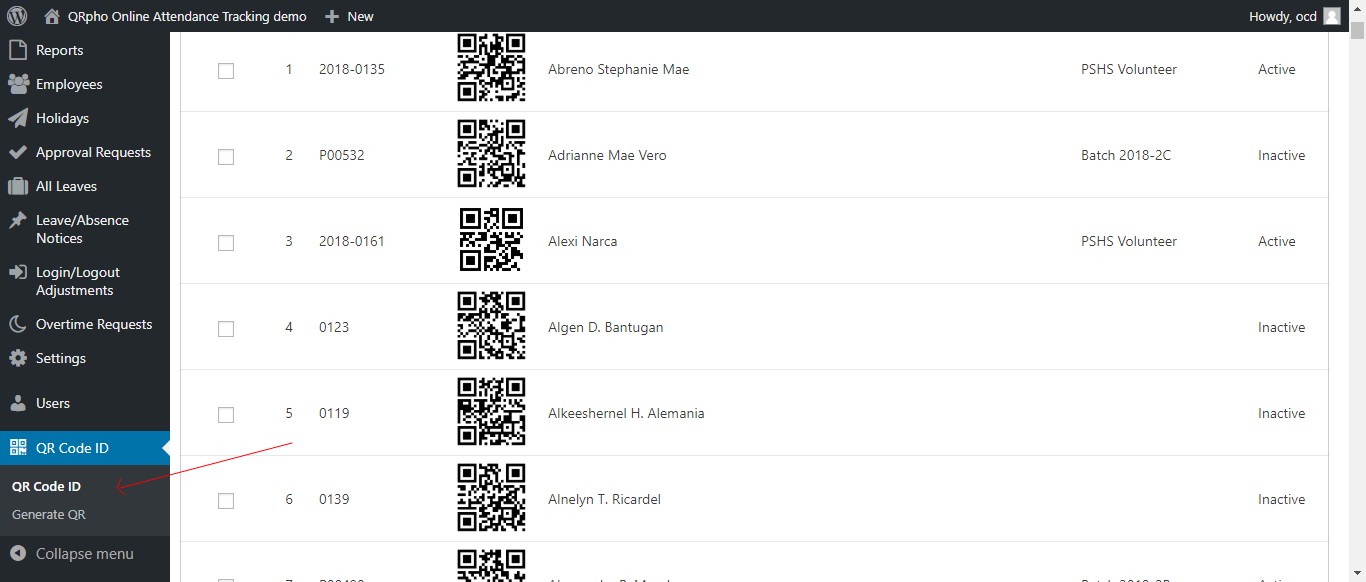
- Print the QRpho IDs using photo paper by going to the QRpho ID menu in the website.
- After the download has completed, you may now start logging-in and logging out.
NEED HELP?
FOLLOW US
Recent Comments