Table of Contents
HOW TO ADD EMPLOYEES?
As you add the employees in the Employee menu, their QR Codes (see QR Code ID menu) and User Accounts (see Users Menu) are automatically created. The default password of the User accounts is 1234 or you can also check in the SETTINGS menu what password is indicated in the New Employee Default Password field. You may also change the default New Employee password here.
There are two ways how to add employees:
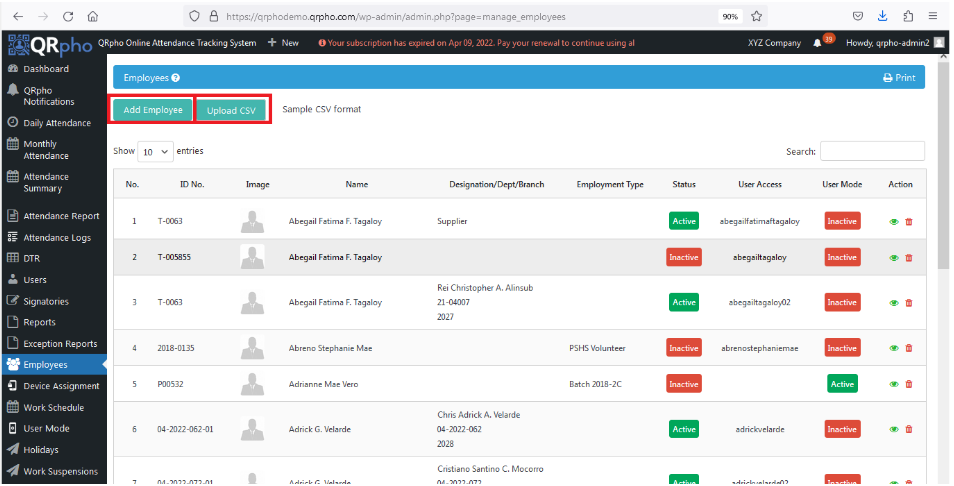
- Add employee button (add individually in the Employee menu)
- Upload CSV
as shown in the image below.
HOW TO USE THE ADD EMPLOYEE FUNCTION:
When to use Add employee function?
ADD EMPLOYEE is best used when you are going to add one to a few employees only.
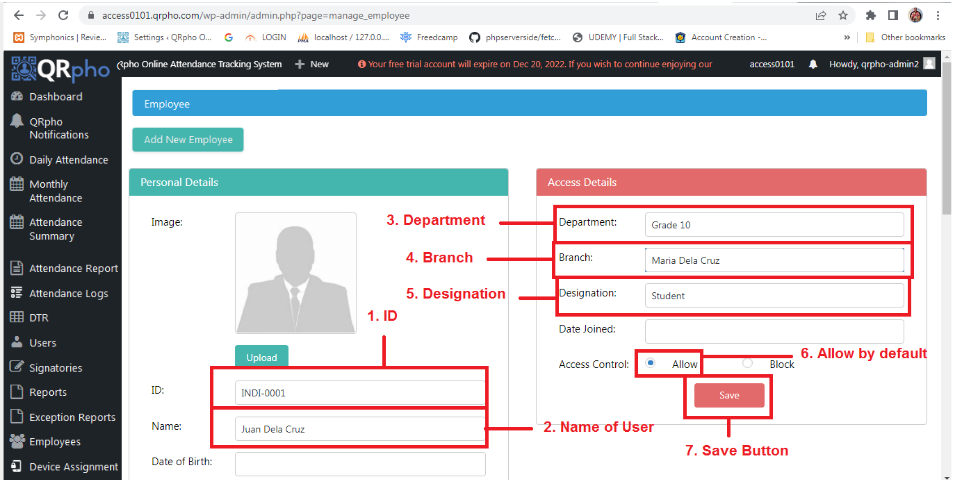
1. Click the ADD EMPLOYEE BUTTON and fill up the required fields as shown in the picture and click SAVE BUTTON. For attendance tracking, you need to input the ID number and Name only. If you need to group them by branch or department, add the Department or Branch info. Make sure the ID numbers and Name is correct as the QR Code of the employee will be based on these info. Should there be changes in the ID number and Name, you should reissue a new QR ID.
Note: Don’t leave the required fields blank like Name and ID number.
TEST LOGIN/LOGOUT
1. Go to QR Code ID menu to print the QR Code IDs. The QR ID is automatically generated in the system as you add employees. Select the box beside the name to print the ID using photo paper. You can create sample employees like (Staff One, Staff Two, etc. ) for testing purposes. You can print the QR ID of the sample employees and then test logging/logging in or out.
How to Print QR Code ID >>
2. Get the tablet/cellphone where the QRpho app (on Kiosk mode) was installed, connect it to the Internet. Wait for a few minutes for the app to download the employee data into the tablet/phone. There is an indicator at the bottom of the device screen of the download process. If no activity, manually download the employee data by clicking the three dots on the upper right hand corner of the app and tap “Download Employee Data“.
3. Once employee data was downloaded, test the QR Code ID if it is registered by tapping the LOGIN or LOGOUT buttons. When using a cellphone, set the cellphone to Portrait when using the app. If the name of the employee was already downloaded in the app, upon tapping the log buttons the app proceeds to ask to Take Photo . If the name is not registered in the app, the app prompts the employee name is not registered. To solve, check the internet connection, the try tapping the “Download Employee Data”
HOW TO USE THE UPLOAD CSV FUNCTION:
When to use Upload CSV?
UPLOAD CSV is best used when you are going to add 5 to hundreds or maybe thousands of employees at a time.
1. Click and download the SAMPLE CSV FORMAT and once the download is finished, OPEN the CSV File.

2. The sample csv file shows in the first 2 rows how the data should be formatted and entered in the different columns. Remove the sample data once you have entered your own data. Make sure no blank row(s) after the header or in the middle of the data.
Note: When adding employee data, you can just enter the ID and Name columns. Other employee info can be added later on by updating the Employee Profile in the Employee menu.
When you have completed adding the employee info in the correct columns and removed the sample data in the first 2 rows, you can now SAVE the csv file.

UPLOADING THE CSV FILE:
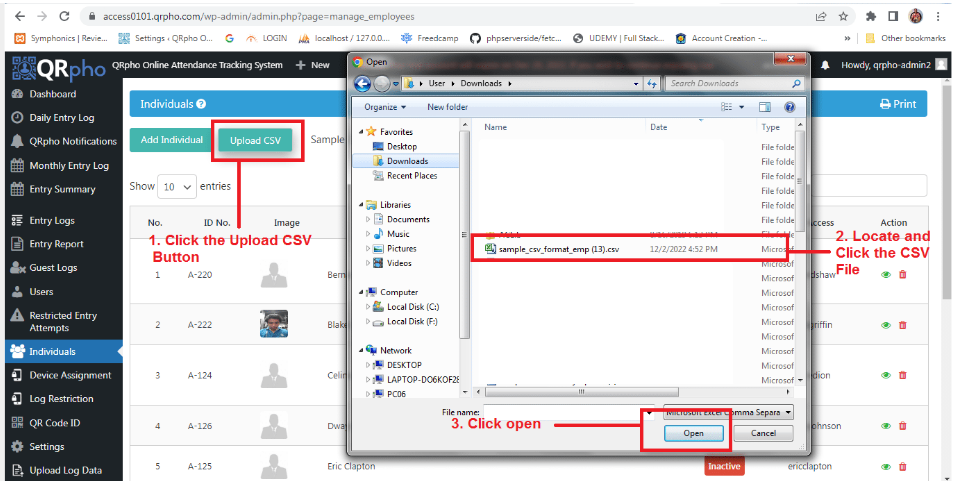
1. Click the UPLOAD CSV BUTTON.
2. LOCATE the CSV file that you saved earlier.
3. Then click OPEN button and the file upload will start.
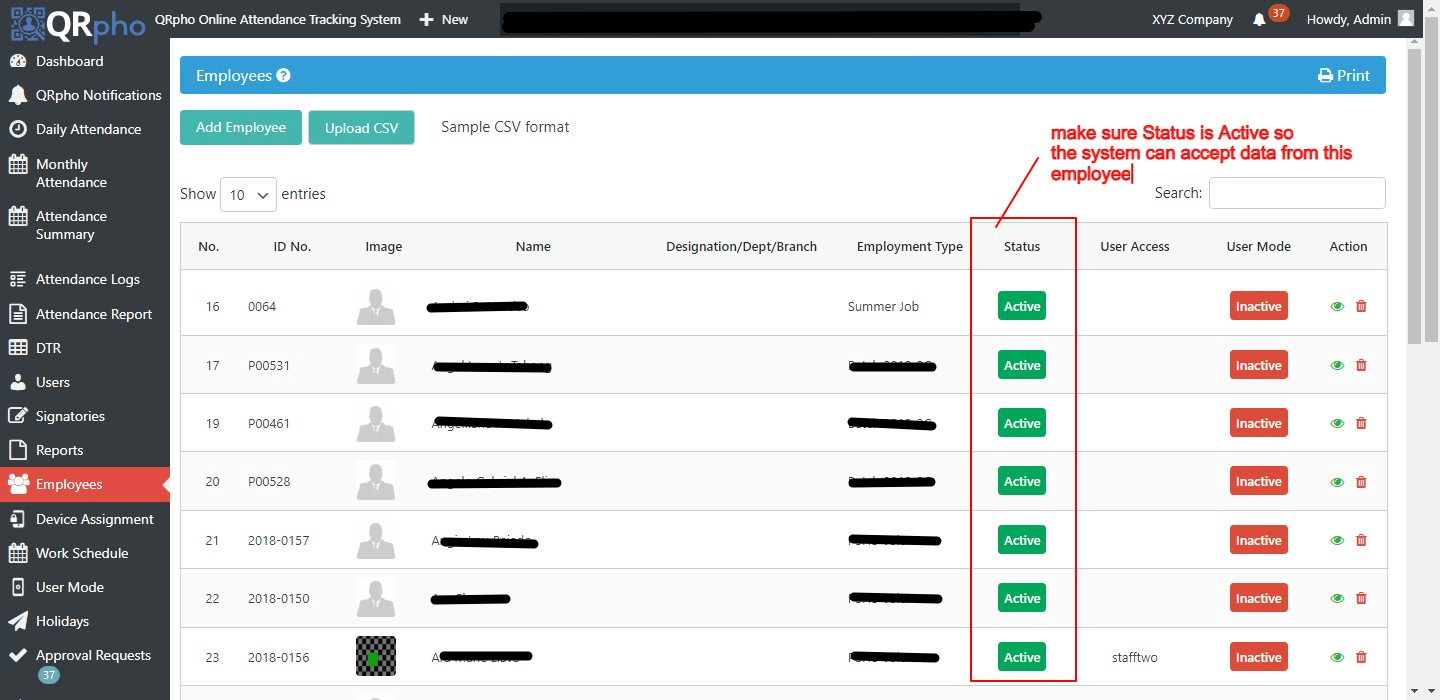
Once the csv file upload is completed and no problems detected, the SUCCESS prompt is displayed.

Then go to the EMPLOYEES menu and check if the Employee Status are now active (Green Active button) by looking at the STATUS column.
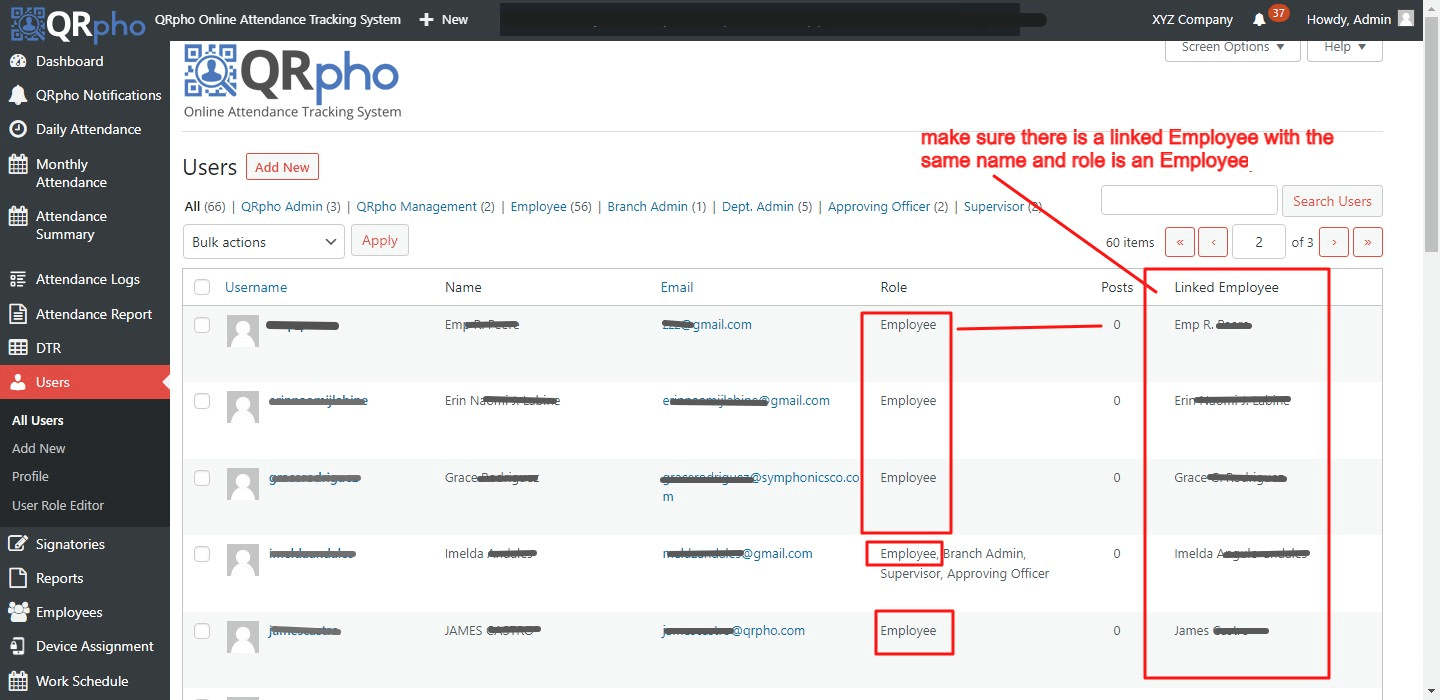
LINKED EMPLOYEE ACCOUNT AND USER ROLE:
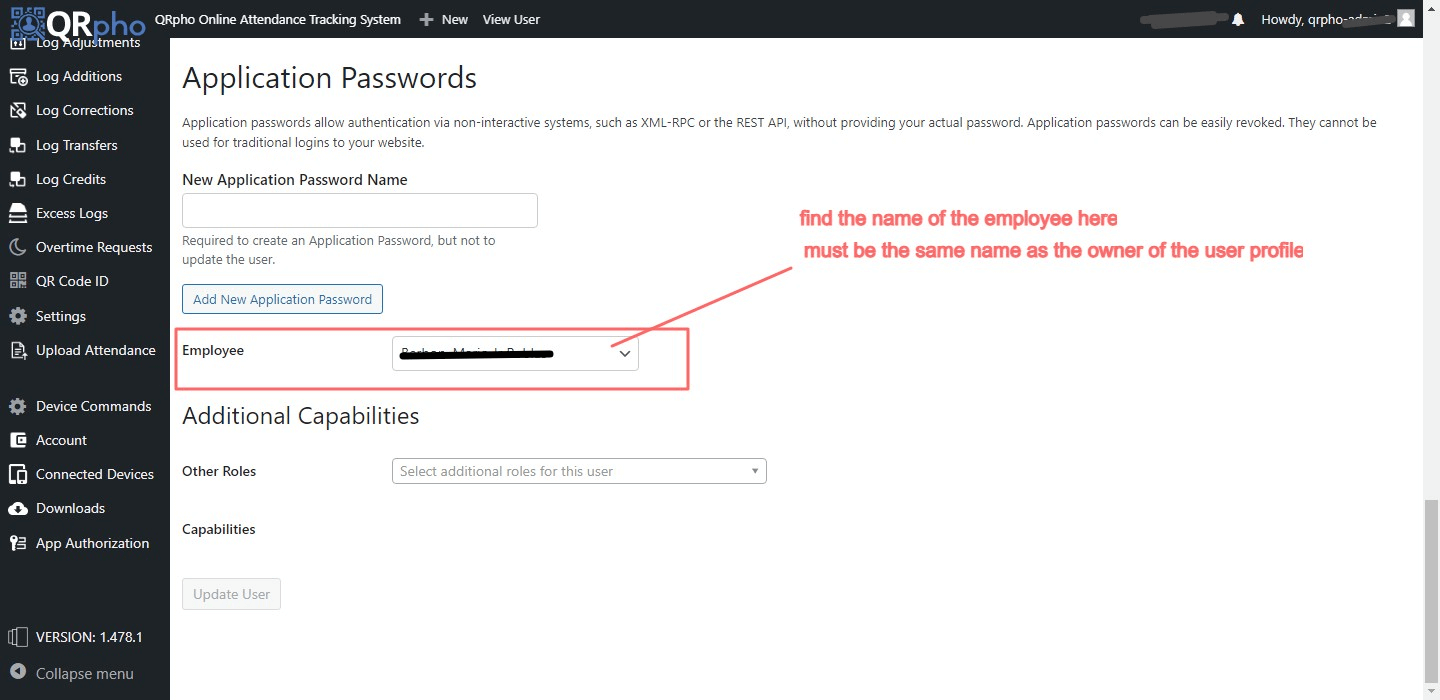
Make sure also that the employees listed in the Employee menu have their Users account linked to their employee account by going to the USERS menu and checking if there is a linked employee account of the SAME NAME and the Employee role is EMPLOYEE. If there is no linked employee account, then open the User profile and go to the EMPLOYEE field and find the name of the employee then click UPDATE USER button.