Table of Contents
HOW TO DO LOG ADJUSTMENTS?
HOW LOG ADJUSTMENTS WORKS:
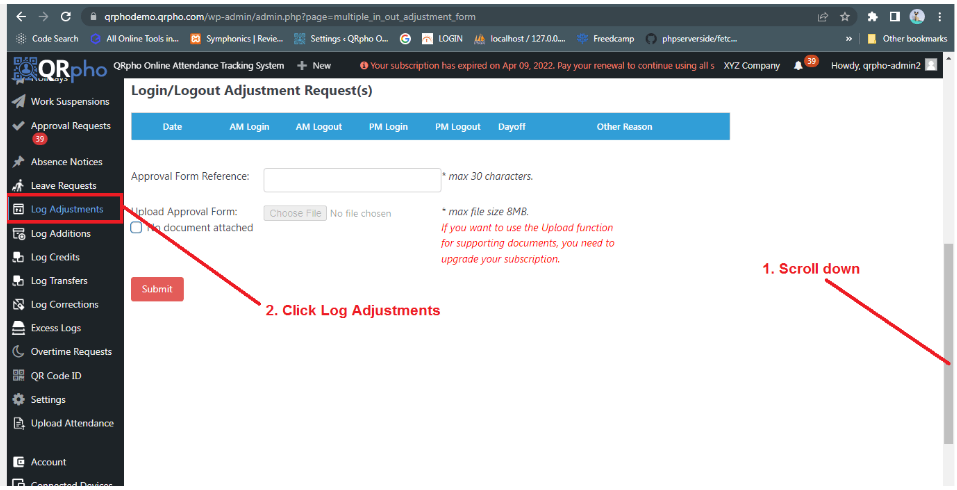
The primary purpose of this Menu is to make manual entry or adjustment in the attendance data of an employee for the missing logins or logouts due to forgetfulness, device failure (broken or out-of-charge), or just missed login/logout due to some valid reasons like out-of-office assignment, out-of-office errands, meetings or seminars. These manual adjustments require the approval of an officer and upload of supporting document. If you don’t want to upload a supporting document, just tap the No Document Attached option box so that the Upload function will be disabled, and no need to upload document.
If the employee really reported for work and just failed to login/logout, then you can adjust his/her attendance data manually. HR Admin can directly input the log data based on a valid supporting document or the Employee can request Log Adjustment using the QRpho App (refer to steps >> How can an Employee Request Log Adjustment) .
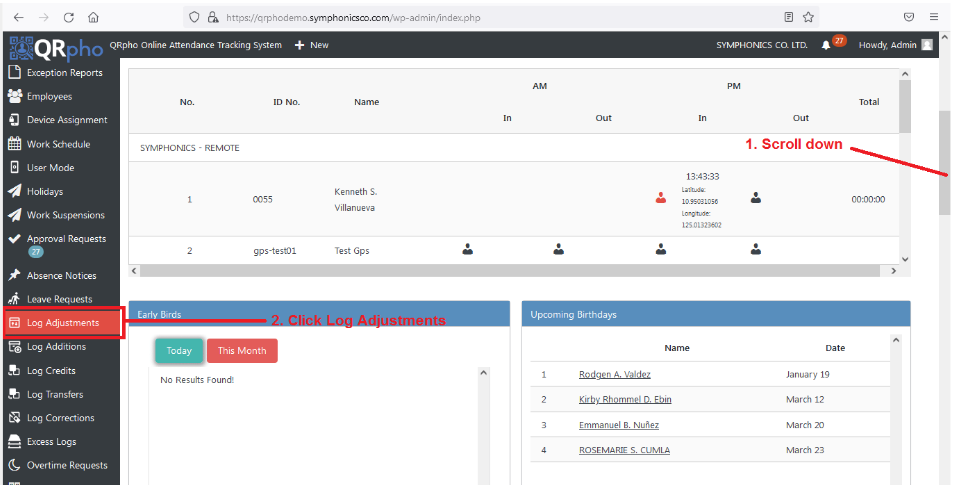
1. From Dashboard, go to Log Adjustments Menu by SCROLLING DOWN.
2. Find and click LOG ADJUSTMENTS.
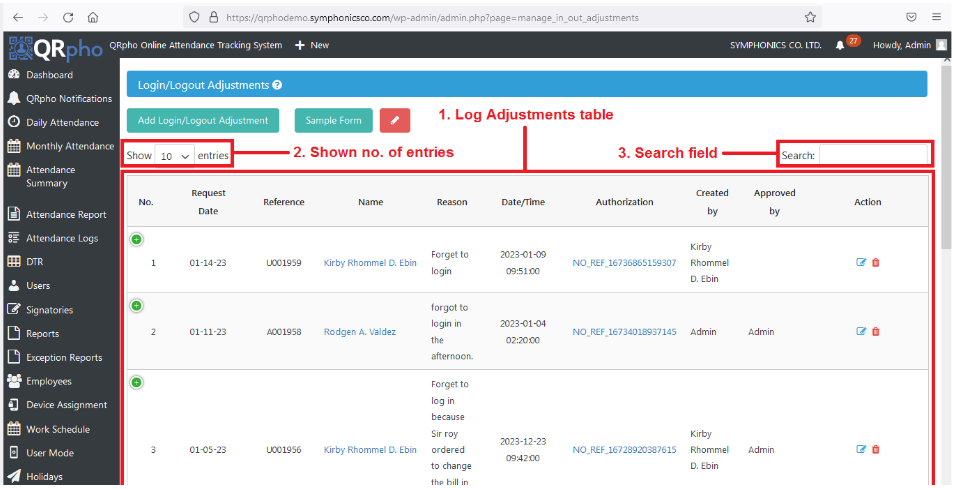
After clicking the Log Adjustments Menu you’ll now be at the Log Adjustments Page.
1. LOG ADJUSTMENTS TABLE. where all log adjustment requests are displayed.
2. SHOW NO. OF ENTRIES. is where you select the no. of entries displayed per page on the table.
3. SEARCH FIELD. is where you filter the data by typing keywords on the search field.
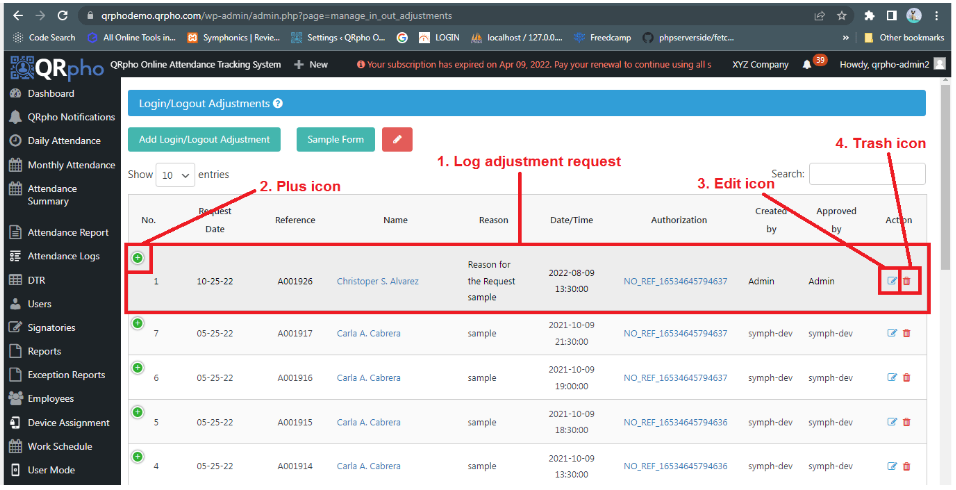
1. You’ll see a LOG ADJUSTMENT REQUEST on the Log Adjustments Table.
2. Click the PLUS icon to know the status of the request.
3. Click the EDIT icon button to edit the request.
4. Click the TRASH icon button to delete the request.
HOW TO ADD LOG ADJUSTMENT REQUEST:
Based on the Log Adjustment request form signed by the Approving Officer, HR can input the log adjustment requests directly into the Dashboard. If HR admin is doing the input in the dashboard, the data is auto-approved or auto-posted to employees’ accounts since it is assumed that HR is holding a valid and duly-approved log adjustment document when entering log adjustments. If the Log Adjustment is made by the employees through the app, then employee requests will go first to the Approval Requests menu for HR to check validity of log adjustment requests. HR can approve or reject requests.
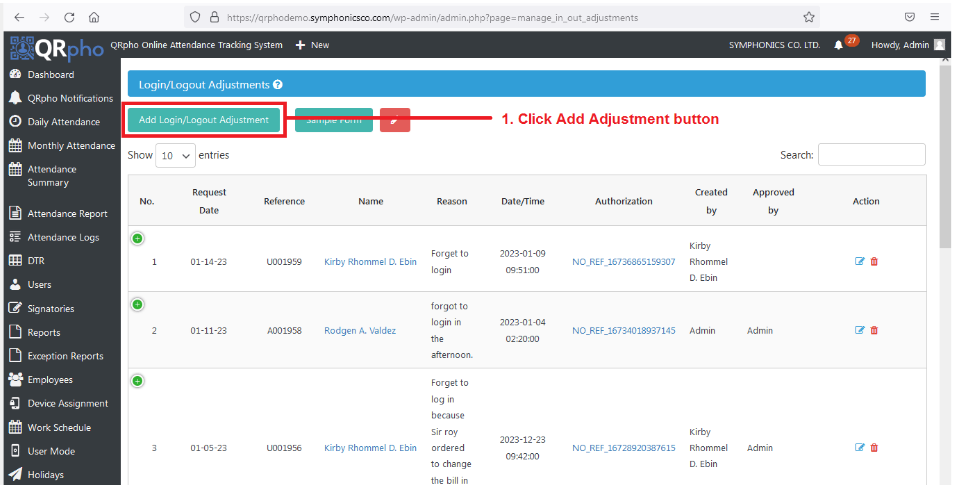
1. Go to LOG ADJUSTMENTS menu and Click the ADD LOGIN/LOGOUT ADJUSTMENT button.
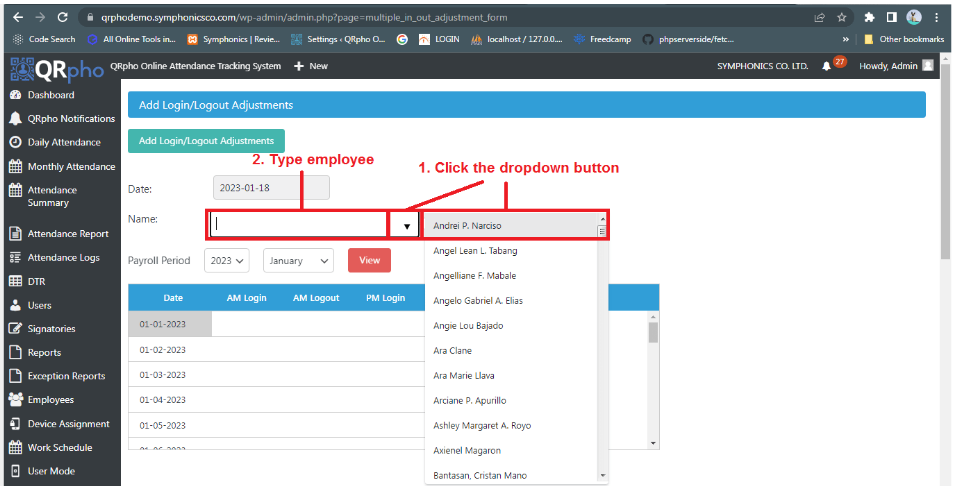
After you click the Add Log Adjustment button, you can now select an employee.
1. Click the DROPDOWN button and SELECT an employee.
2. Or you can just TYPE the name of the employee and the list will filter itself depending on your keyword search.
3. After selecting the employee, select the Payroll Period and click View button.
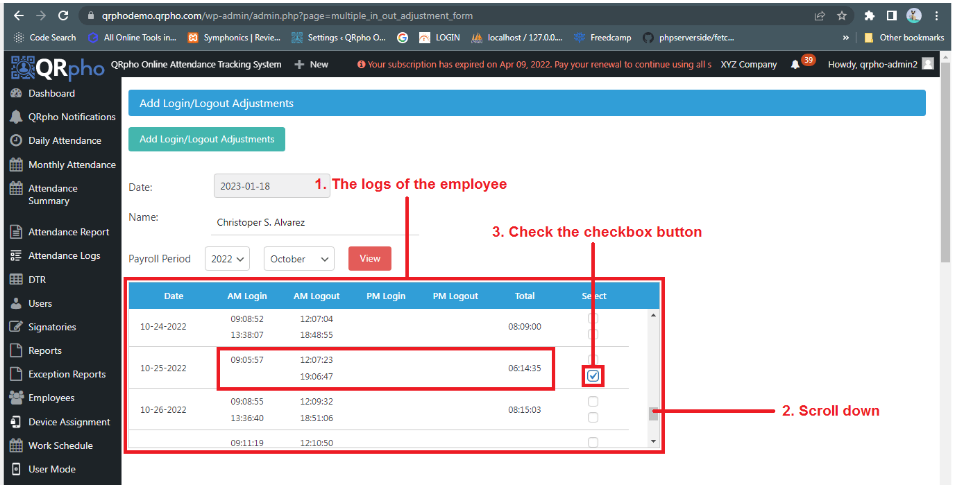
After clicking the VIEW button.
1. It DISPLAYS all the Logs of the employee based on the selected Payroll Period.
2. SCROLL DOWN and find the date on which you want to adjust the logs.
3. Click the CHECKBOX of the selected logs.
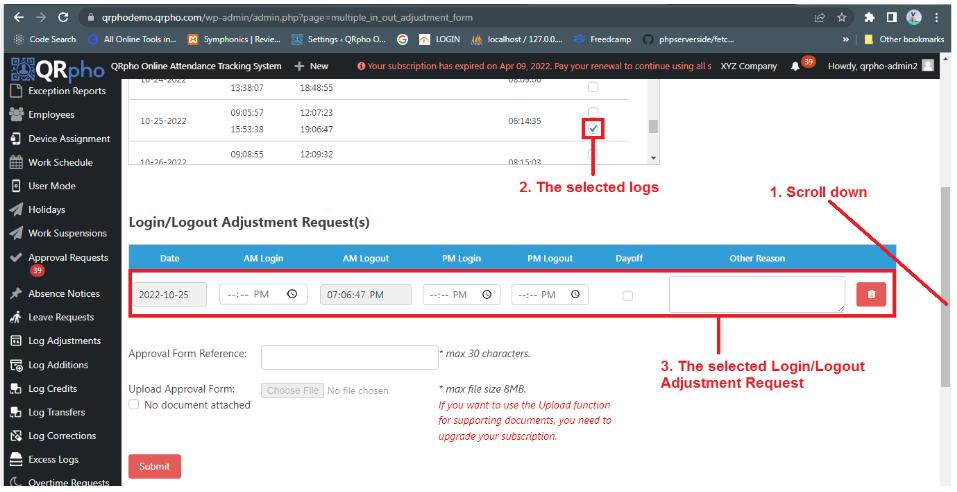
After selecting a log, scroll down to the bottom of the page to input the adjustment.
1. SCROLL DOWN.
2. The SELECTED LOGS.
3. The SELECTED LOGS FOR ADJUSTMENT REQUESTS.
Ath the Login/Logout Adjustment Request section, all logs selected above will be displayed here for editing but you have to indicate reason for editing and attached supporting documents. However, you opt not to attach a supporting document.
You can now do further actions on the Selected Logs.
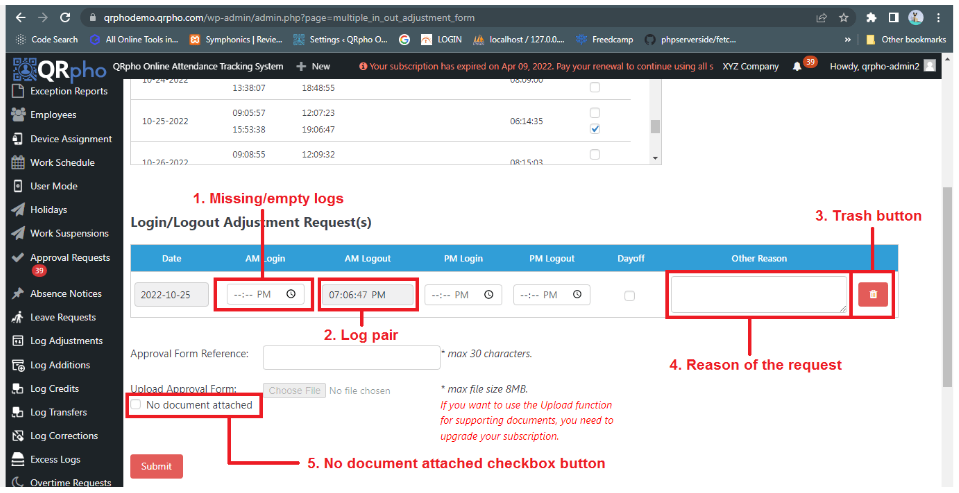
1. MISSING/EMPTY LOGS. are logs that are empty. It can be login or logout.
2. LOG PAIR. is the pair of empty logs. It can also be a login or logout.
3. TRASH BUTTON. is an action button to delete the request.
4. REASON FOR THE REQUEST. state your reason for the request.
5. NO DOCUMENTS ATTACHED CHECKBOX.
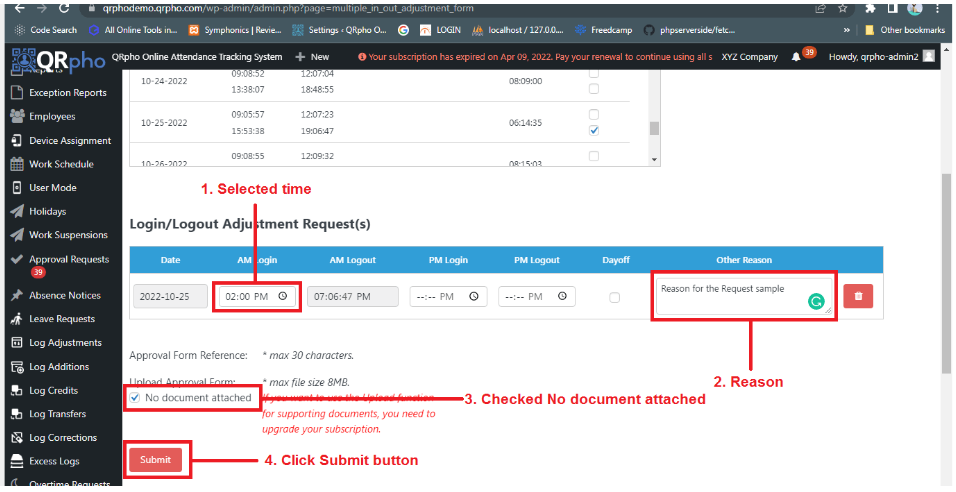
At the Login/Logout Adjustment Request(s), input the adjustments in the empty fields.
1. The SELECTED TIME of the empty logs.
2. REASON for the requests.
3. CHECKED No document attached, if you don’t want to attach a supporting document.
4. Click the SUBMIT button.
Note: The reason used in this article is an example only. Use an appropriate and valid reason for the request.
After submitting, you can now see the requests in the Log Adjustments table. The adjustment logs will be posted in the Attendance Report as a red-colored time. Red-colored time in Attendance Report means the time is manually adjusted via Log Adjustment.
1. SCROLL DOWN.
2. click the LOG ADJUSTMENTS MENU.