Table of Contents
USER ACCOUNTS
If you want employees to access their attendance data anytime anywhere using their own cellphone or computer, do the absence notice, overtime requests, log adjustments, corrections, and leave requests by themselves then you have to give them access to their own data by creating a User Account for them.
USER ACCOUNTS AUTOMATICALLY CREATED
Recent versions of QRpho Web automatically create User Accounts as the name of the employees are added into the system using the Employee menu. The default setting for the user account are as follows:
username: firstnamelastsuffix >>> all small letters, no space
password: firstname1234
For example:
Employee name: John Carlos dela Cerna Jr.
Username: johndelacernajr
Password: john1234
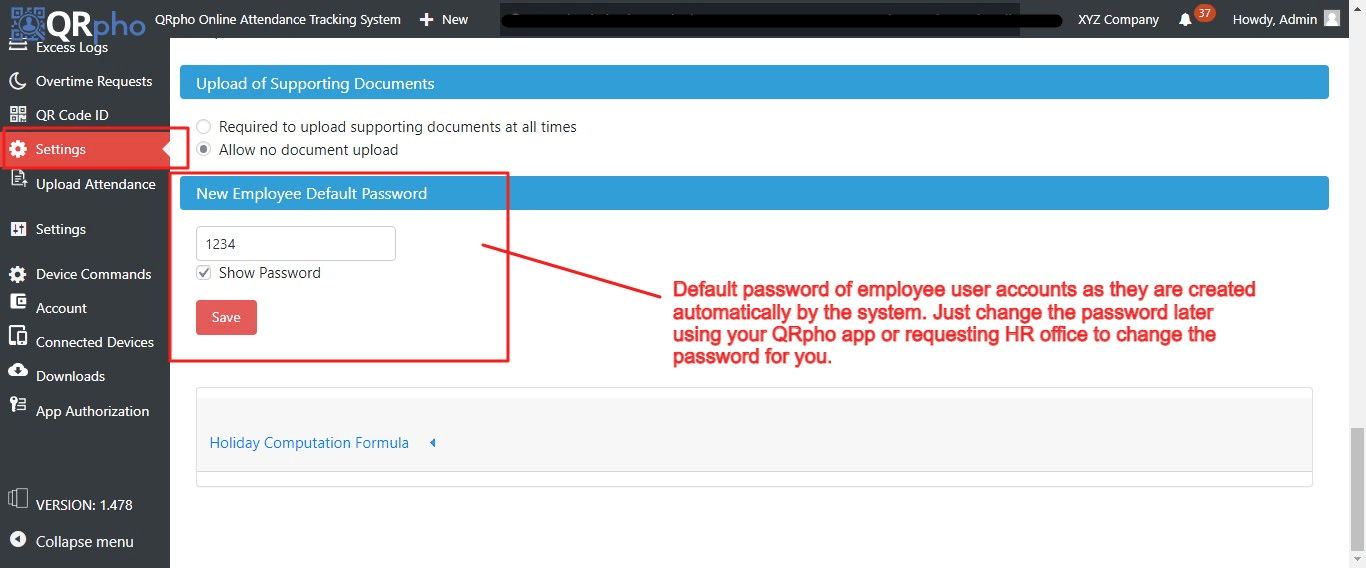
DEFAULT PASSWORD
The default password of the user accounts as they are created by the system can be seen in your Dashboard under the SETTINGS MENU >> New Employee Default password.
RESET USER PASSWORD
Upon first login of the employee using the default password, the system asks the user to reset the password before proceeding. The employee has to reset the password to maintain privacy. Then, the employee has to keep a note of his/her password to avoid the inconvenience of not being able to login to the QRpho website. Otherwise, they can do a Forget Password option or call the HR office to request a reset password.
HOW TO CREATE A USER ACCOUNT
If you want to create another user account, just follow these procedures.
PROCEDURES:
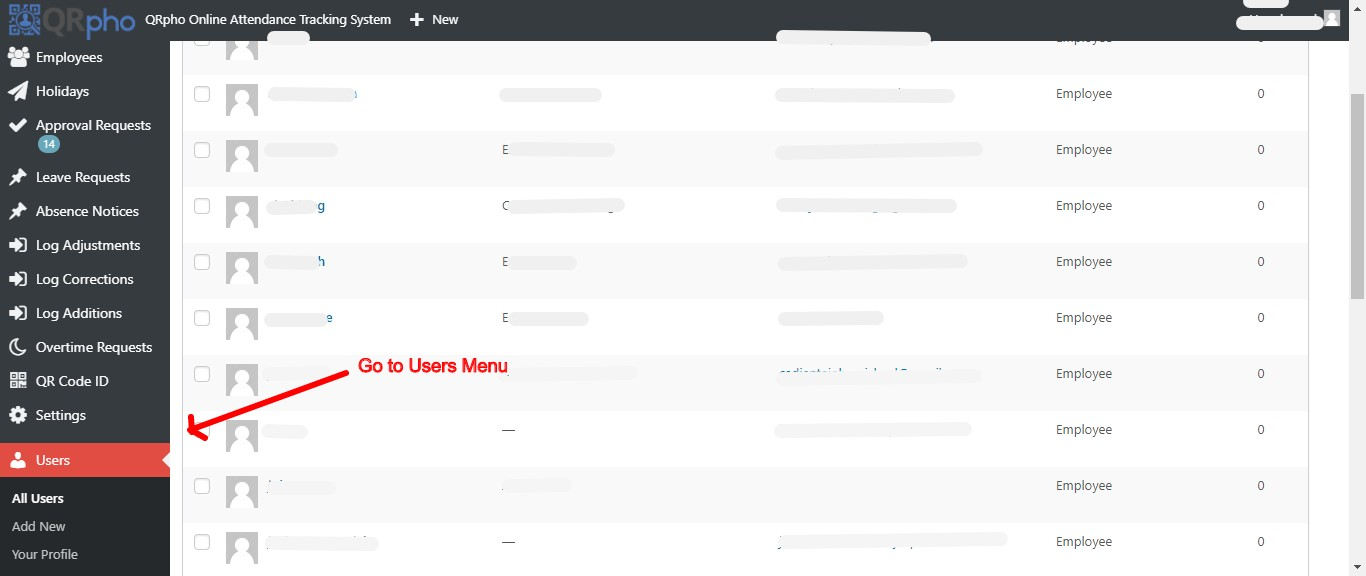
1. Go to USERS menu in the Dashboard
2. Click the Add New button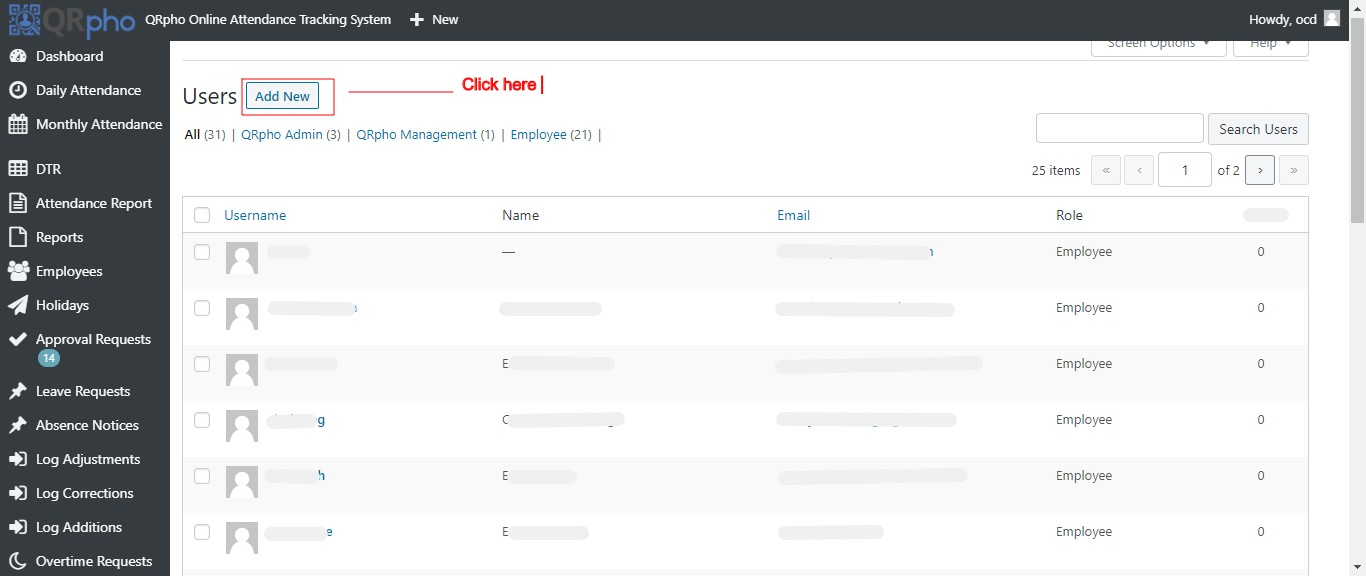
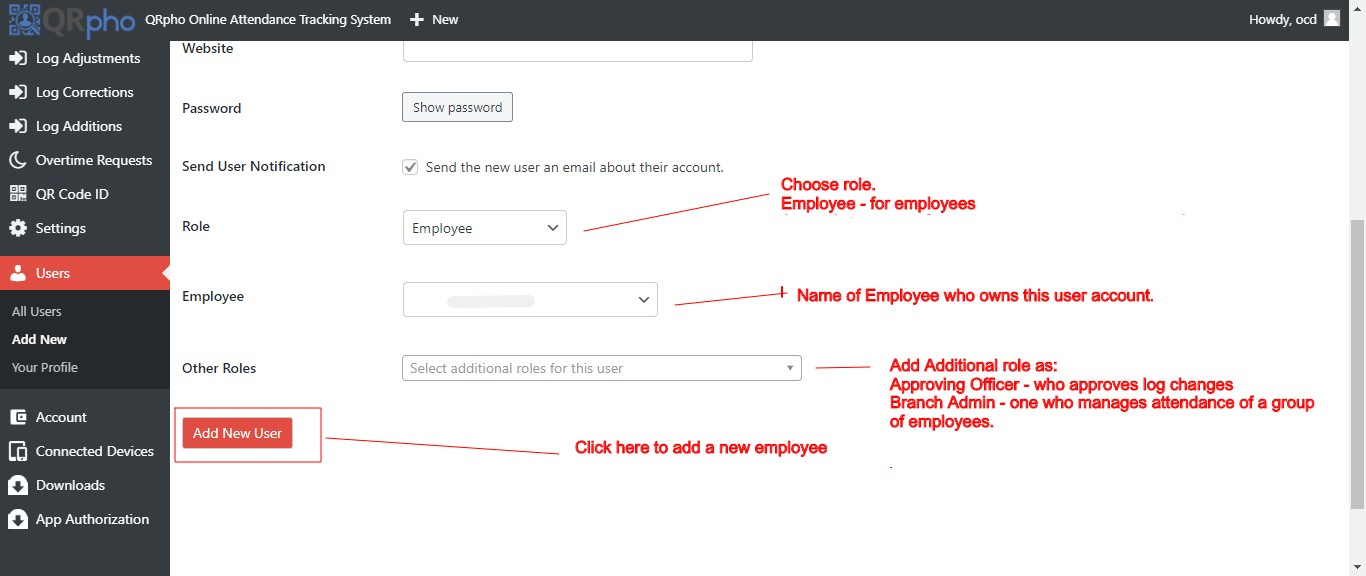
3. Fill up the required info.
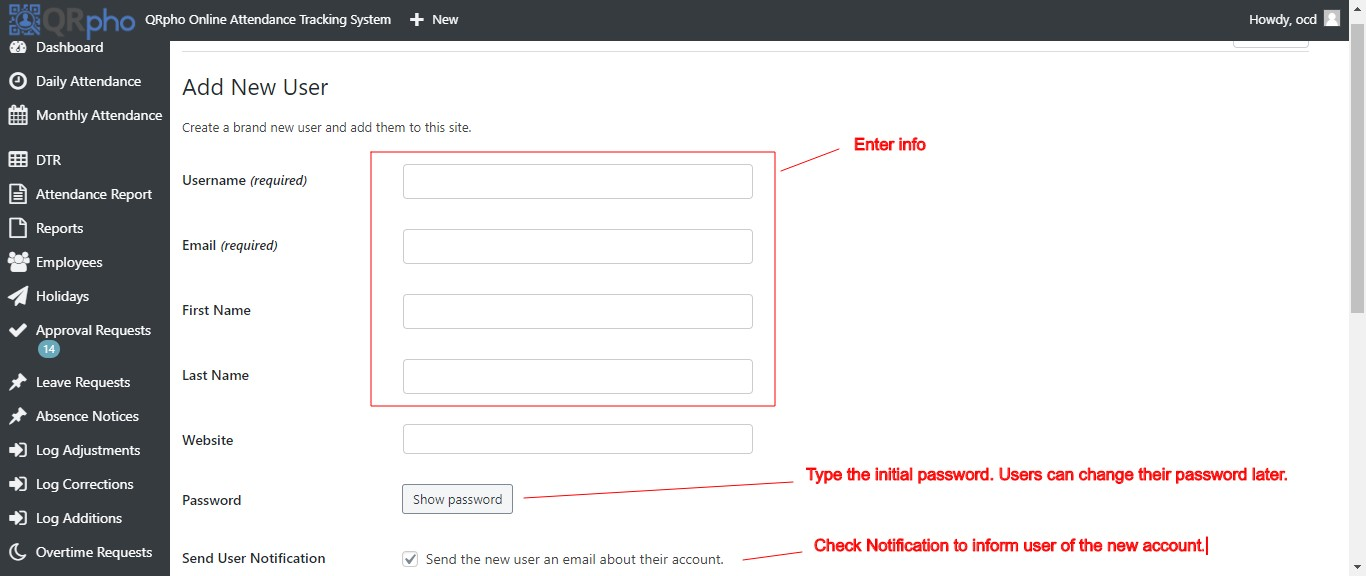
4. Set the role of the user to Employee. Then in the Employee box, set it to the name of the employee to link the user account to his/her employee data. You may add other roles for the specific employee if he has any. If none, leave this section blank.
5. Click “Add New User” button to create the User Account profile.